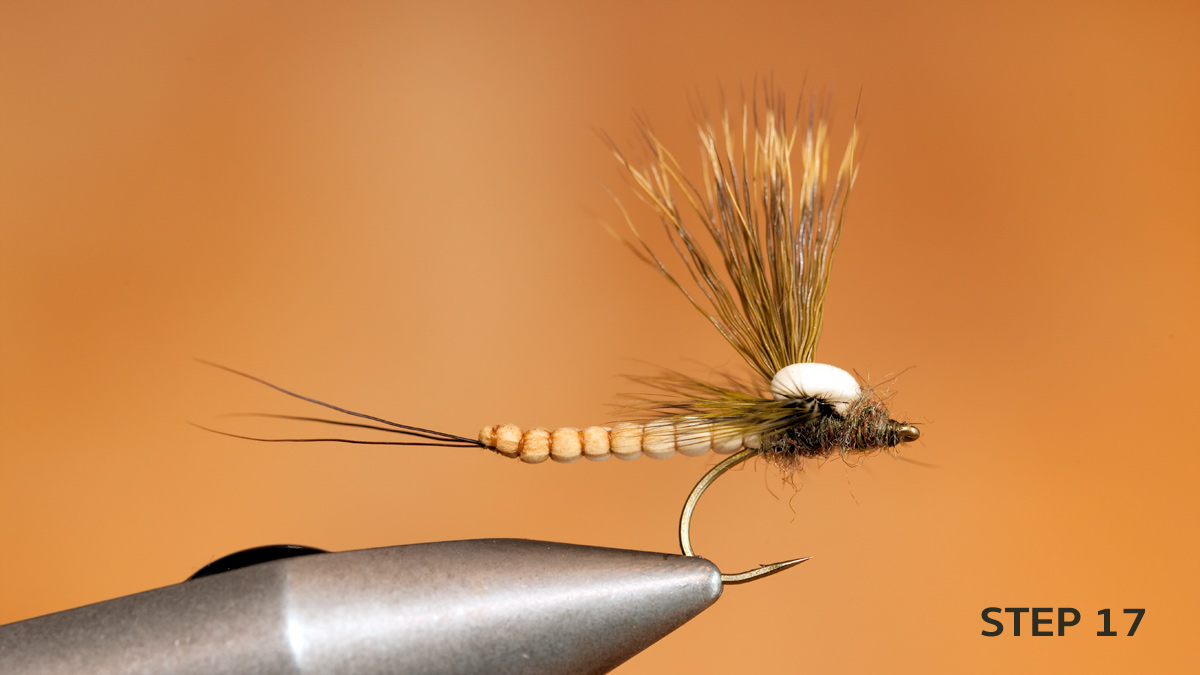
This Step-by-Step guide helps you tie the Mohican Mayfly 2.0. The fly is based on Oliver Edwards’ great pattern. The pattern is modified and simplified using modern fly tying techniques. The fly is also dubbed differently than the original. In this example the fly is tied to imitate an Ephemera Danica.
This fly is virtually unsinkable. The foam body and the life west on the thorax makes the Mohican 2.0 a great fly to fish. The complete materials list is found here.
Step 1
Here are the tools and materials you’ll need to tie the Mohican Mayfly 2.0. A complete materials list is found in my fly tying database.
Step 2
This guide presupposes that you already have prepared an extended foam body. I prefer to use the J:son method. Description of the technique is found here. Several other approaches might be used, as long as you end up with a body like this.
Step 3
Tie in the thread to approximately the tip of the hook.
Step 4
Tie int the foam body on the last segment. Make sure the body is secured before proceeding. Use 3-4 turns on the body, and a few rounds just in front of the body (fold the shoulders of the foam body back). You can use UV glue under the shank to secure the body in the right position.
Step 5
Prepare a pinch of olive dyed deer- or moose hair. Don’t get crazy on the hair – use a moderate amount. Stack to align the tips.
Step 6
Measure the lengt of the wing. Just a tad shorter than the body plus the thorax. A to long wing wil make the fly propel.
Step 7
Tie in the wing the point where the foam body stops. Fold back the shoulders of the foam body. Cut the hair short before tying in. It will make it easier to tie a tidy thorax and head.
Step 8
First create a wingpost on the deer/moose hair. It will serve as a help when tying in the wing.
Step 9
Then tie the foam to the wing post. Make sure the foam stays at the back of the wing.
Step 10
Align two hackle feathers on top of each other. Tie them in with the dull side facing up. Start tying just in front of the wing with a few loose turn, then increase thread tension. Make one or two rounds over the stems at the back of the wing.
Step 11
Dub the first part of the thorax – leave 3-4 millimeters free in front to make room for the foam in later steps.
Step 12
Use fingers or a hackle plier to create an ordinary parachute hackle. Two turns are ok, three is plenty. Secure the hackle. Do not worry about stray barbules, you can hair dress them later. Cut the hackle.
Step 13
Cut some of the hackle barbules in front – creating a V-shape. Moisten your fingers and pull them back. This is the first step in forming the delta wing.
Step 14
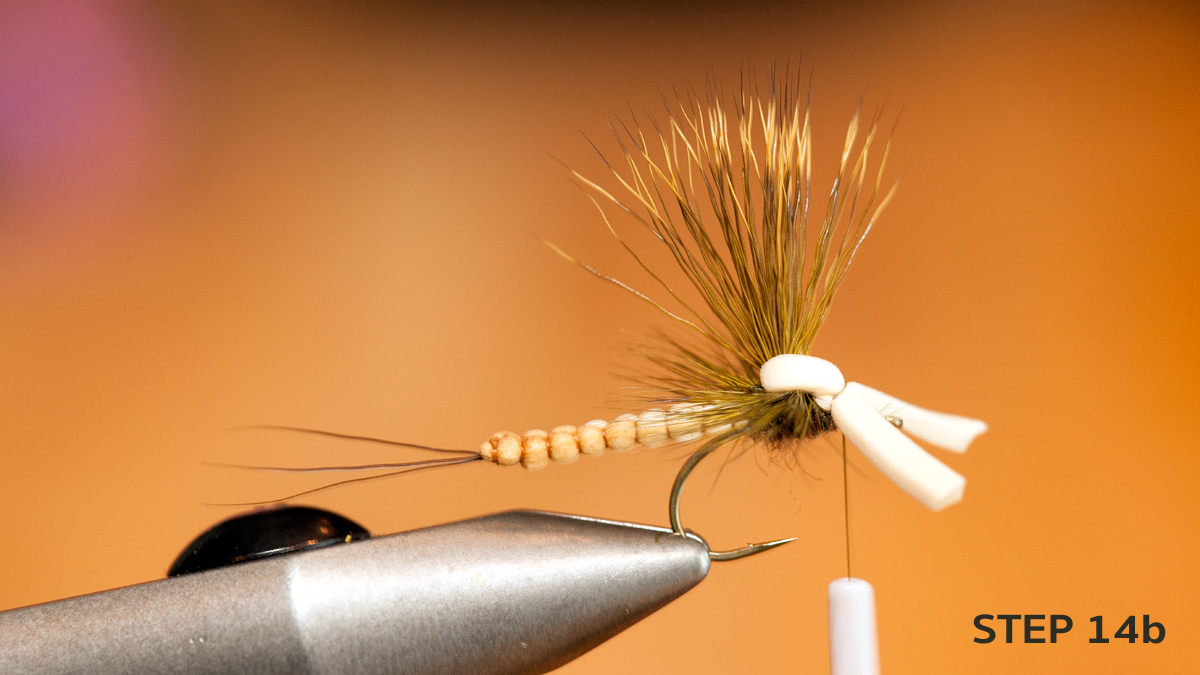
Moisten your fingertips, and evenly drag the hackle to each side of the wing. You do want to form a delta-wing on this fly. No barbules in front. Then take one of the two foam shoulders that’s now pointing upwards at the back of the wing, and fold it and stretch it forwards across the hook shank in front of the wing. Then take the other and stretch it forwards, but to the opposite side. Make sure as few barbules are caught as possible. Tie in the foam about 2 millimeters from the eye of the hook. Cut of the remaining parts.
Step 15
Secure the foam by forming a tapered head. Prepare a dubbing noodle
Step 16
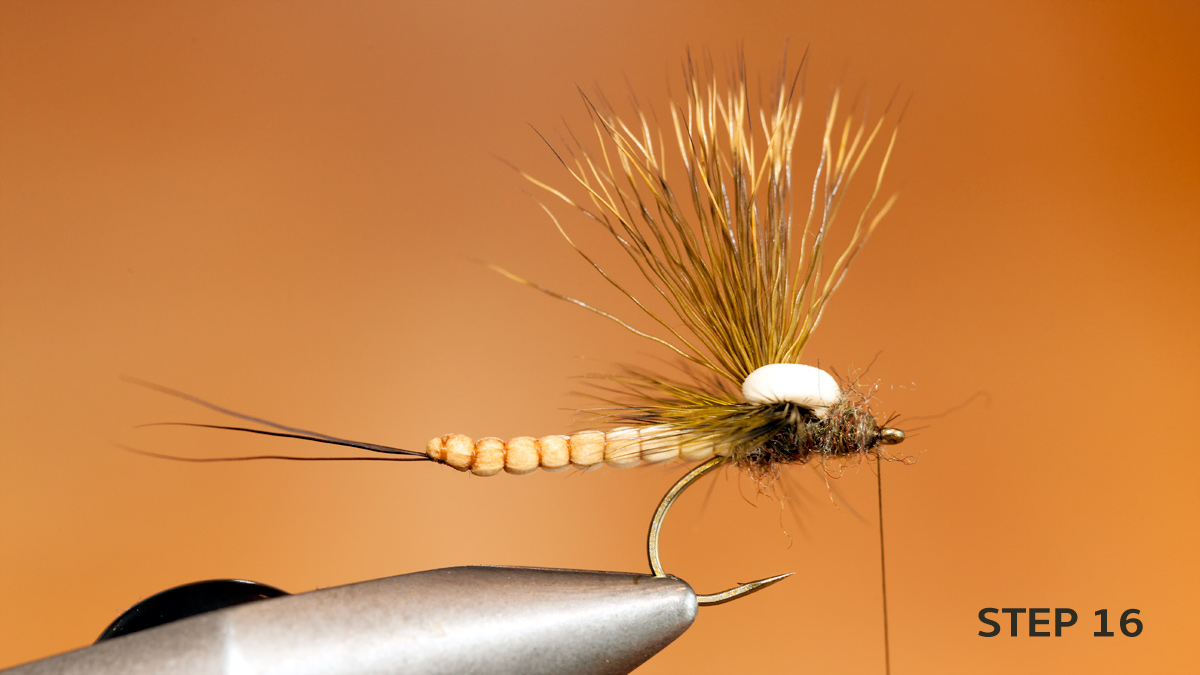
Dub the final part of the thorax.
Step 17
Tie off, and use head cement to secure. Trim any stray barbules that’s now probably stuck under the thorax.
Go fishing!


Great SBS of a great fly 🙂 Thank you for taking the time to make the SBS and your page. It’s an inspiration in every way 🙂 Easy to look at and interessting info 🙂
Thanks Jon-Anders!